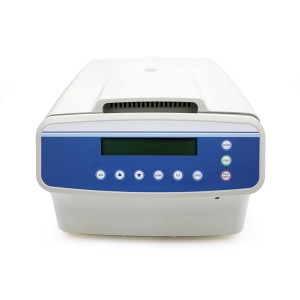
1. Heating/cooling mode setting:
Click on the "Cold/Heat" button, the "cooling indicator" will light up, this is the cooling mode, click on the button again, the "heating indicator" will light up, this is the heating mode, the default is heating mode; (only when the machine stops running can the mode be switched).
2. Temperature settings:
Click on the "SET" button, the display flashes, then click on the " " and " " buttons below the temperature to adjust the temperature, press and hold to accelerate the adjustment.
3. Time Setting:
To set the heating time: click on the "Cold/Heat" button so that the heating indicator lights up, then click on the "SET" button and the display flashes, then click on the “ ”and“ ” button to adjust the heating time, long press to speed up the adjustment; when the time is set to 0, it is continuous operation mode. Cooling time setting: click on the "Cold/Heat" button to make the cooling
indicator light up, then click on the "SET" button and the display will flash, then click on the“ ” and “ ” button to adjust the cooling time, press and hold to speed up the adjustment; when the time is set to 0, it is continuous operation mode.
4. PROA/PROB
PROA mode setting: When the machine is not running, press and hold the temperature down button for 3 seconds, release the button when you hear the buzzer beep, then the display will start flashing, then press the temperature +/- and time +/- to adjust the parameters (long press to speed up the adjustment),when the parameters are adjusted click the "Save" button to save the set parameters, click the "Start/Stop" button to start running; if you want to exit the PROA mode, just power it up again.
PROB mode setting: When the machine is not running, press and hold the temperature up button for 3 seconds, release the button when you hear the buzzer beep, then the display will start flashing, then press the temperature +/- and time +/- to adjust the parameters (long press to speed up the adjustment),when the parameters have been adjusted click the "Save" button to save the
set parameters, click the "Start/Stop" button to start running; if you want to exit the PROB mode, just power up again
Note: PROA and PROB modes can be switched between each other without re-energising.
5. Save:
When the temperature and time settings are complete, click on the "Save" button to save the set parameters.
6. Start/stop:
Click on the "Start/Stop" button, when the "Start indicator" lights up, the machine starts to run, click on the button again, the "Stop indicator" lights up, the machine
stops running; when the temperature reaches the set temperature, the timer function opens, after the timer time is over, the machine stops running and the buzzer will beep.
7. Calibrations:
Press and hold the "Save" button before powering on the machine, then turn on the power and release when the machine displays the "CAL" icon, then enter the single point calibration mode, adjust the temperature to the point to be
calibrated, then click the "Start/Stop" button. Start/Stop" button, when the "Start indicator" lights up, start calibration, when the displayed temperature stabilisesto the set temperature (minimum 20 minutes), then adjust the display on the right hand side to match the actual temperature measured by the temperature gauge, then click the "If the calibration fails or the displayed temperature is abnormal, please restore the factory settings and then recalibrate.
8. Restore factory settings:
Press and hold the "temperature down" button before powering on the machine,then turn on the power and release when the machine shows the "rS" icon, at this time to restore the factory parameters, re-power the machine, restore the
completion.